Windows Server 2012 and 2012R2 documentation

Microsoft did a good work with Windows Server 2012 and 2012R2 documentation. They put together all TechNet documentation to one PDF document, so now you can have concentrated all the server documentation in one single file. It is complete, easy to find (OK, there are approximately 8000 pages…) and all in one place. Very nice.

This file is downloadable from TechNet by clicking this link..

Migrate from SBS 2008 or 2011 (Part 3)

Migrate SharePoint Data (Optional)

This step is an optional. If you are using SBS SharePoint, you might wish to migrate it. SBS deployments that don’t use this component, can skip this step.
You will be able to attach a content database to a destination server only if the version of SBS SharePoint is SP2 or later and the content database is prepared for migration.
To check the version of SharePoint, follow this steps:

  1. In Start menu go to Administrative tools and lunch SharePoint 3.0 Central Administration.
  2. Click on Operations in top menu.
  3. Click on Servers in farm on the left pane.
  4. On the right pane you can see the SharePoint version of Small Business Server. If it is SP2, the number must be at least 12.0.0.6421. For migration proposes it will be acceptable any version greatest of this one.

Before you begin with migration, it is necessary to verify upgrade readiness on SBS Server. Follow this steps:

  1. Open Command prompt as Administrator.
  2. Navigate to folder C:Program FilesCommon FilesMicrosoft SharedWeb Server Extensions12BIN, where C: is the name of the system drive.
  3. Run the Command STSADM.EXE -o preupgradecheck.
  4. Review the report located in C:Program FilesCommon FilesMicrosoft SharedWeb Server Extensions12LOGS and search for errors.
  5. If there are no errors, the site is ready to upgrade, otherwise correct all the errors.

On the new server install SharePoint Foundation following this steps:


  1. Download the package from http://www.microsoft.com/en-us/download/details.aspx?id=5970.
  2.  Run the downloaded package and click Install software prerequisites.
  3. On SharePoint preparation tool click Next.
  4. Accept EULA and click Next.
  5. It will take few minutes to complete all installation tasks. After this click Finish.
  6. Rerun the downloaded package and select Install SharePoint Foundation.
  7. Accept EULA and click Continue.
  8. On Choice the installation you want select Server Farm.
  9. It will take few minutes to complete the installation.
  10. On the Installation complete screen, leave the checkbox in Run configuration wizard and click Close.
  11. Complete the Configuration Wizard specifying your configuration.
  12. Click on Start, All Programs, SharePoint 2010 Products and lunch SharePoint 2010 Central Administration.
  13. In the Web Applications section click Manage Web Application.
  14. In the Ribbon click New.
  15. In Create Web Application window change those values:
    1. In the IIS Web Site section:
      1. Select Create a new IIS Web Site.
      2. In the Host Header box type your desired host name.
    2. In the Application Pool section:
      1. Select Create new Application pool.
      2. Select Configurable.
      3. Type the Account used for running the application pool.
    3. In the Database Name and Authentication section:
      1. In Database name type the desired name of the database (later will be removed).
  16. On the bottom of the page click OK.
  17. On the Application created screen, click the OK button.

To transfer content database to the new server, follow this steps:

  1. On SBS Server lunch SQL 2005 Management studio as Administrator.
  2. In Connect to Server window in Server Name type: \.pipeMSSQL$MICROSOFT##SSEEsqlquery and click Connect.
  3. Expand Databases and right-click on ShareWebDB, then click to Task, Backup…
  4. In BackUp Database window, under Backup destination, select Disk and click Add… to select backup file name.
  5. Click OK and wait the job to complete.
  6. Transfer the backup file to the new server
  7. On the new server run SQL 2008R2 Management studio as Administrator (or another version of the supported SQL server).
  8. Connect to desired instance and right-click on databases.
  9. Select Restore Databases…
  10. In Restore Database window add parameters do this:
    1. In To Database write the name of database to restore – ShareWebDB.
    2. In Source for Restore select From Device and use the button () to select the backup file of database.
  11. Click OK and wait that task complete.

To transfer content to new server we will use the attach database method. This could be done using this steps:

  1. Go to Start, All Programs, SharePoint 2010 Products and run SharePoint 2010 Management Shell as Administrator.
  2. In Shell type Test-SPContentDatabase -name ShareWebDB -WebApplication http://<SITE_NAME>:80 (where <SITE_NAME> is the name of the Web Application and ShareWebDB is the name of the transferred database).
  3. It is all normal, if you don’t have any output.
  4. In Shell type  Mount-SPContentDatabase -WebApplication http://<SITE_NAME> sharewebdb (where <SITE_NAME> is the name of the Web Application and ShareWebDB is the name of the  transferred database).
  5. Check in Internet Explorer for the availability of site http://<SITE_NAME>.
  6. Verify the migrated content by browsing the web site.
  7. On the web site go to Site Settings and select Visual Upgrade.
  8. In Visual Upgrade window, in Visual Upgrade section, select Update the user interface and click OK.


Migrate from SBS 2008 or 2011 (Part 4)

Migrate from SBS 2008 or 2011 (Part 2).

Internal computers not accessible in RDWeb

When I tried to configure my Remote Desktop Web Access on Server 2012 I had a problem. I was unable to connect to the internal computers (they were not accessible on the network).
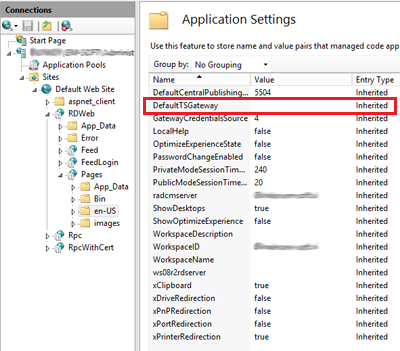
This is happens because RD Gateway configuration is missing (picture).

You can solve this issue in two ways. The first way is simply by typing RD Gateway in the IIS configuration. To see the configuration you have to open IIS and navigate to Sites > Default Web Site > RDWeb > Pages > en-US (or other language). There you have to click on Application Settings and write the public name of TS Gateway to the variable Default TS Gateway. You can also change some other setting like GatewayCredentialSource and others, but be careful.
The second way to correct this issue is editing web.config in the folder C:windowsWebRDWebPagesen-US. Here you can manually add TS Gateway. Web.config will look like this:
<?xml version=”1.0″ encoding=”UTF-8″?>
<configuration>
    <appSettings>
        <remove key=”PasswordChangeEnabled” />
        <remove key=”DefaultTSGateway” />
        <add key=”DefaultTSGateway” value=”rdweb.public.com” />
        <add key=”PasswordChangeEnabled” value=”true” />
    </appSettings>
</configuration>
After this change, try to connect to the internal computers. They should work..

Installing applications on terminal server

In many cases I still see, that administrators don’t install applications for publishing on terminal servers correctly.
I want to tell you once again, that the right installation of those applications is a crucial point for good working in Remote application mode. Here is the right way how to prepare the environment to install those applications from command prompt:

  • Before the installation, you must enable the “installation mode” with the command change user /install. This has to be executed from elevated command prompt.
  • Install the application (from command prompt …).
  • After you installed the applications successfully, you have to return into “running mode” with the command change user /execute.

Of course, you can also install applications true Control Panel and Add programs. This is also a right way to install applications..

Migrate RDP License server to Server 2012

One of the things we have to do when we upgrade our server environment, is to migrate licenses for the RDP clients. This job is done by the RDP Licensing server. I want to explain the process of migrating licenses from Windows Server 2008R2 to Server 2012.

The process is easy, but before you start the migration, is necessary to have the documentation for all licenses (you need authorization numbers or keys during the migration process).
The first step is the installation of the RDP Licensing role in Server Manager true Add Roles and Features Wizard.
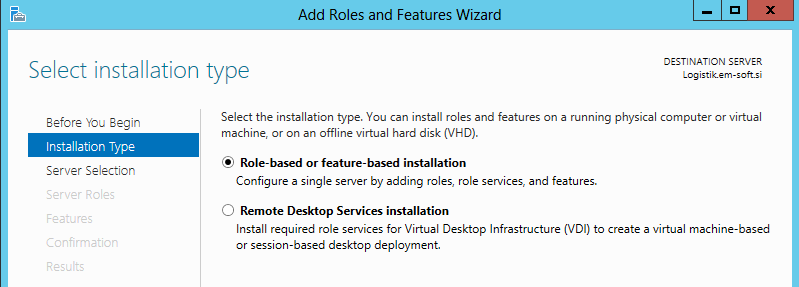
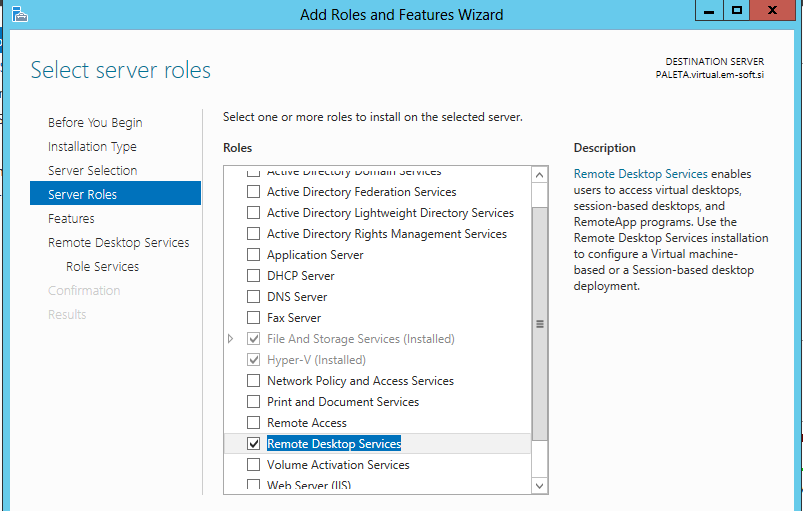
Here you have to select Role-based or Feature-based installation and in the Server Role step you have to check Remote Desktop Services.
Later, on Remote Desktop Services, on the step Role Services, you have to check Remote Desktop Licensing (of course you can check also other functionalities if you need them).
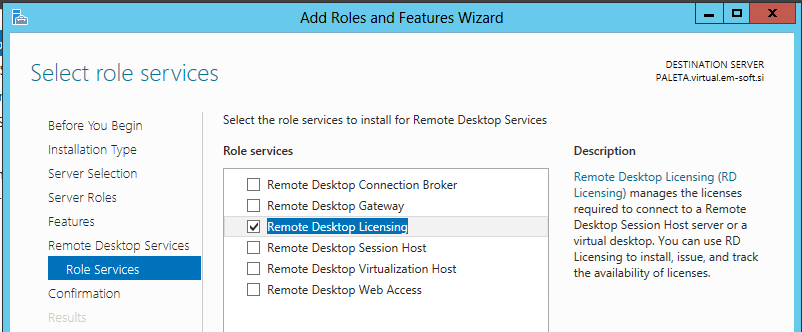
Complete the wizard.
In the Server Manager menu Tools, Terminal Services, open the Remote Desktop Licensing Manager, right click on the installed server and select Activate server.
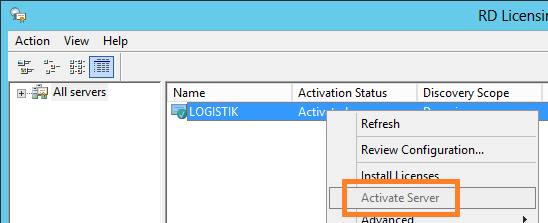
Add your data and complete the activation wizard.
The next step is transferring the licenses from the old server to the new one. To do this, you have to right click on the newly installed server and select Manage Licenses.
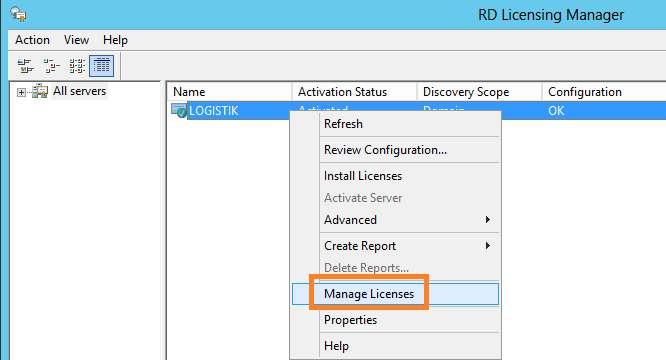
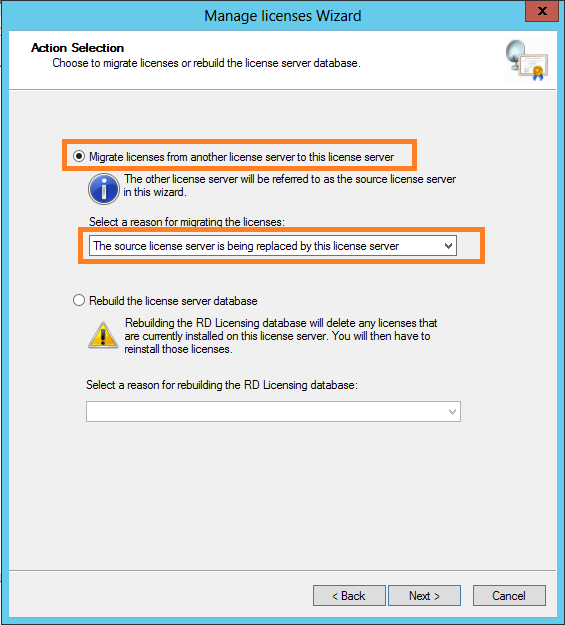
This will open the Manage licenses wizard. As the first step, select Migrate licenses form another server to this license server and select the reason (in most cases is The source server is begin replaced by this license server). Click Next.
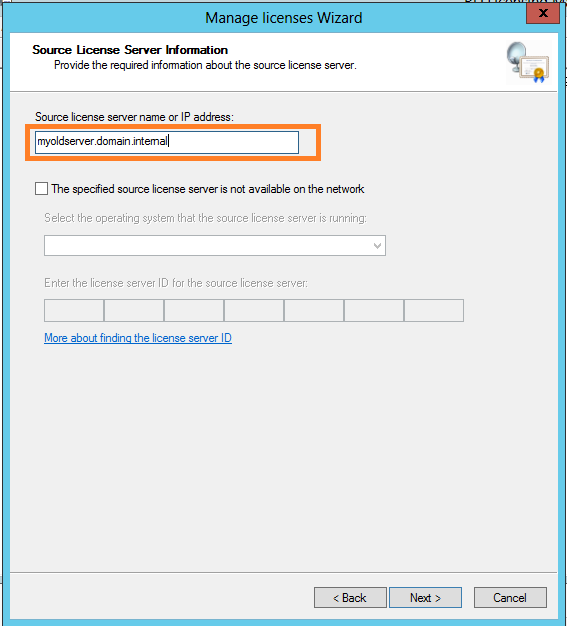
In the next step, you have to identify the old, decommissioned server, by typing his name or IP address. Click Next.
At this point, you need to type your keys or agreement number and confirm the licenses with the Add button. When you have added all your licenses click Next.
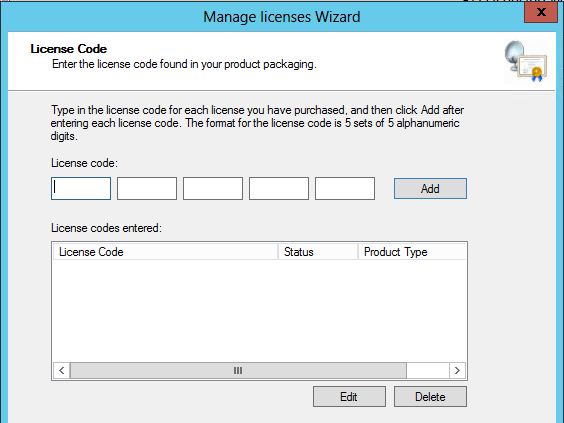
The wizard will transfer your licenses to the new server. At this point you are ready to unauthorize and uninstall the old server..