Azure File Sharing (AFS) is a new technology, currently in public preview, used for caching files or syncing file servers or cluster around the datacentres. If you want to know more about useful scenarios where to use AFS, I suggest you to read this blogpost or watch this video.
In this post, I will explain how to install AFS on a server to be synchronized with Azure. I will go thru installation of the first server, but installing agent on the second or any other server is just the same process as for the first one. Of course, you must have an active Azure subscription (you can open a trial, but this will be time limited – maybe just for testing) and a supported server OS – Windows server 2012R2 or Windows Server 2016.
First step is done in Azure. Here we have to prepare the Storage account:
- Login to Azure portal
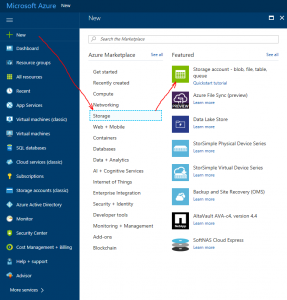
- On the Left side menu select +New, in Marketplace select Storage and then Storage account and click Create.
- Write the Name of the account, the Account kind MUST BE »General purpose« and Replication »Locally-redundant storage (LRS)«. Set Storage Service encryption and Storage Transfer required to »True«.
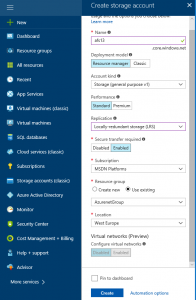
- You can create a new Resource group or use the existing one.
- Use one of the supported Locations. (list)
Now we have to create an Azure File Share:
- Navigate to Storage account that we have created previously
- In Overview find section Files and click on + File Share
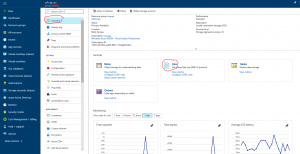
- Write the Name and click Create.
As last, we have to create Storage Sync Service:
- In Azure Portal, click on +New, in search box type » Azure File Sync«, select Azure File Sync (preview) and click Create.
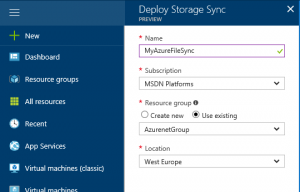
- Fill all fields, use the same Resource group as in Storage account and click Create.
For now, we have finished to prepare the Azure part and we will move to our on premises server. We will install Agent here and test prerequisites.
First, we have to find if our server has all that we need to install the agent:
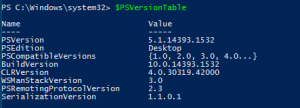
- We will need PowerShell version 5.1 or higher. You can check this from PowerShell with cmdlet $PSVersionTable. If PSVersion is lower than 5.1, then you must upgrade PowerShell by installing WMF 5.1 Package (install Win8.1AndW2K12R2-KB3191564-x64.msu)
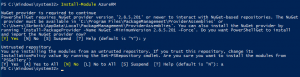
- Install AzureRM cmdlets with installing PowerShell module: Install-Module AzureRM (Answer Yes to continue and to install from untrusted repository – it is a preview).
- Register AFS provider: Register-AzureRmResourceProvider -ProviderNamespace Microsoft.StorageSync.
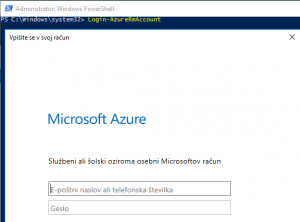
 In case that you receive this error, run cmdlet Login-AzureRmAccount
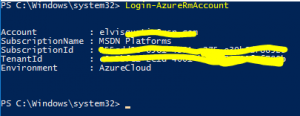
- Disable Internet Explorer Enhanced Security Configuration (you should do this because you have to login into Azure later).
Now we will install the agent on the server that we want to sync:
- Download agent installation from Azure portal
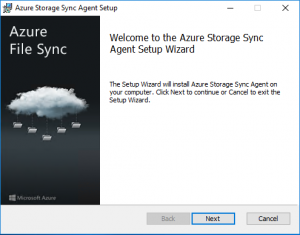
- Run the installation wizard
- On a welcome page click Next, accept the license agreement and click Next.
- On the Feature selection you can change the location for the files and click Next
- Consider using Windows Update services to update the AFS agent (it is already a part of MS Updates) and click Next
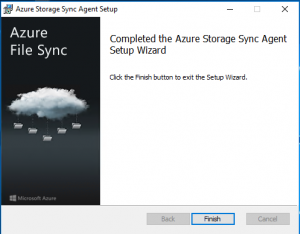
- Click Install
- After the installation is finished, the server registration will run. If this will not happen or you want to run it manually later, you can search for file ServerRegistration.exe and run it.
- In Server Registration, sign in to Azure with your Azure subscription (this step will open an Internet Explorer window to sign in process)
- Select the needed data (Subscription – if you have more than one, Resource group that you used in previous steps and Sorage sync service that you created before)
- Click Register.
- After successful registration, you completed a server agent installation, server registration to AFS service.
We have now created Storage Sync Service, installed agent on our server and registered our server to created Storage Sync Service, but we haven’t yet configured the synchronization between Azure and on premises servers – so synchronization is not working in this moment.
We have to add Azure server as an endpoint in Sync Service. The easiest way to do this is in the Azure portal:
- Login to Azure portal
- Navigate to Storage Sync Service we created and in Overview click on +Sync group.
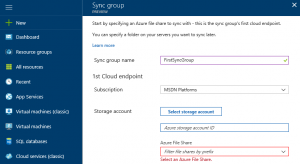
- Type all data and click Create.
- Click on Sync group you created and add Server Endpoint
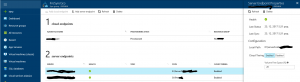
- When you are adding server Endpoint, you have to enter FULL LOCAL PATH on the server and the percent of free disk space on local server (can be different for any server).
Done! You have now created Azure File sync and you have just to wait for the first sync. Of course, it can take some time – depends on the amount of data, but after this you will have all your files safe in Cloud. For this reason, you can use this service as a DR scenario.
If you want to add an additional server to the same AFS service, just repeat all steps that were done on the local server and register it to existing AFS account. Different server scan host locally different files (depends on usage), can be member of different domains or workgroups – so you can use this technology for some collaboration projects as well.
