Cryptolocker…

Everyone of us want to stop Cryptolocker and similar programs. It seems that it is really a nightmare for all admins. Anyway, to stop Cryptolocker and any unwanted program, you have to be aware, that this will bring limitations to your system, which are not always welcome.

How does Cryptolocker work?
We have 5 phases of Cryptolocker infections:

  1. Installation: The software is delivered to your computer via download or E-Mail attachment and the user click on it. The executable is now installed, the registry keys are set and we are ready to go to the next phase.
  2. Contacting headquarters: the computer is contacting criminal headquarters for registration, so it will prepare all environment for phase 3.
  3. Creating keys: headquarter and client are now identifying each other and are ready to “handshake” and create two keys for encryption.
  4. Encryption: Cryptographic keys are now established and the encryption can begin. It depends on version, but almost all files on all local and shared drives where you have permissions will be encrypted.
  5. Extortion: The screen with a guide how much and where to pay is displayed. There is displayed also how much time you have for payment. If you will not pay in time, the headquarter key will be deleted and you will not be able to decrypt files. The payment is every day higher – so if you want to pay, do it immediately.

To prevent a large number of unwanted software, the first step to do is always remove LocalAdmin permissions and turn on UAC. This two actions will put you in situation where user will not be able to install any application and write to system crucial folders. Also have your system always up to date. And I don’t mean only OS, but include all applications installed (we know attacks to Java, Adobe FlashPlayer, Microsoft Office…).
Of course this is not enough as a lot of bed guys know how to elevate permissions or are using different folders (for example AppData is used for Cryptolocker), but been a LocalAdmin is a great way to become a victim. I suggest to all home users and system administrators to use two different accounts – one for daily use and the second for administrator tasks.
Well, the real way to prevent Cryptolocker is blocking the execution of exe files in AppData folder. You can do this with group policy in AppLocker or in software restriction policy. This are steps for basic protection with AppLocker:

  1. Create new GPO for Cryptolocker prevention
  2. Edit new created GPO
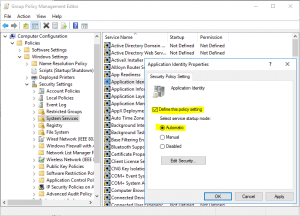
  3. Expand Computer configuration > Policies > Windows Settings > Security settings > System Services
  4. Enable “Application Identity” service and set it to automatic startup modeCrypto1
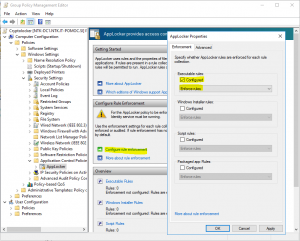
  5. Go down to Application Control Policies and expand to AppLocker
  6. In “Configure role enforcement enable Executable rules and make them in Enforce mode (I suggest you, to run them in Audit mode for week or two and analyze logs before enforcing them – just to find legal applications which can be blocked)Crypto2
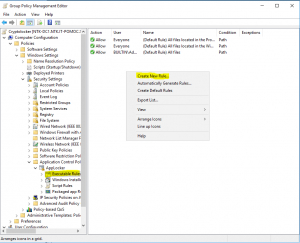
  7. Expand AppLocker and click to Executable rules
  8. Right click in action pane and create Default Rules
  9. Right click in action pane and create New RuleCrypto3
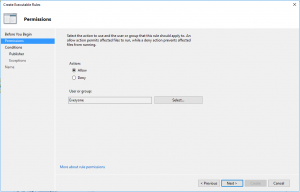
  10. In Permissions on Action set Allow for EveryoneCrypto4
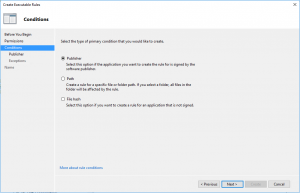
  11. In Conditions select that is Publisher ruleCrypto5
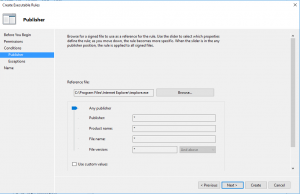
  12. In Publisher, just browse one file (in my case was Internet Explorer) and go with slider up to Any publisherCrypto6
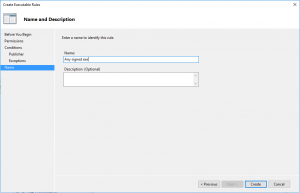
  13. Give the name to the ruleCrypto7

So, this is about AppLocker, but we have still a lot of work to do. There is a big surface for attack if users are local admin. To prevent this, configure Restricted groups in GPO by using Computer Configuration > Policies > Windows Settings > Security settings > Restricted Groups.
Apply this GPO to all computers and the first step is done.
GPO is a good way to prevent Crypto, but be aware that Crypto is evolving and you have to evolve with him. And preventing Crypto with GPO means that executable is already in your system – maybe you have to prevent it before is downloaded or received with mail. For this step you will need the application firewall, good antivirus in file system and in mailing system.
But still you can do something with chip devices with closing outgoing ports 83, 846, 777, 997, 1604, 9001, 9003, 444, 9052, 8443, 7777, 9003 and 25254. This ports are used to communicate with headquarter servers to obtain a certificate for encryption (maybe exist also other ports or will be added / changed during the time). If you will close this ports, the system will not be able to retrieve a certificate for encryption and the encryption will not be able to begin. Be careful on notebooks because the users will bring their notebooks at home and the encryption will be successful.
As you can see, there are a lot of ways to prevent Cryptolocker, but you have to prevent it. When you have it, it is too late – think about it now!

And for home users? Well we cannot forget them. They have a lot of pictures and documents on their computers – practically a whole life and is a really big impact to lose all this material.
I suggest you a software from FoolishIT. It is free and it is working good (but if you want to keep it up to date, give those few Euros to the author – he is doing his job well!).


Additional reading:
https://blogs.technet.microsoft.com/mmpc/2015/01/13/crowti-update-cryptowall-3-0/
http://www.crowdstrike.com/blog/4-0-another-brick-in-the-cryptowall/
http://researchcenter.paloaltonetworks.com/2015/02/analysis-cryptowall-3-0-dyre-i2p/
https://tools.cisco.com/security/center/viewAlert.x?alertId=36338
Create redirected folders with PowerShell

As many of us know, to setup redirected folders you have to create root folder, permissions and sharing manually. You do it always in the same way: search internet for exact permissions that you need to set, control that is all OK, than share the folder…
Therefore, the job is ideal for a script as is always done in the same way; the only thing that is changing is the folder location and the domain name.
To simplify all this work I wrote a script to create a folder, setup the right permissions and share this folder. The only things you have to change in the script are:

  • the folder name and location
  • the name of shared folder
  • the group to which redirection will apply
  • the domain admins group (it is changing the domain)

You have to write these four variables in the beginning of the script and then just run it. All the work is done!

You can download script here..

Publish Print server 2012R2 with CNAME record

As you probably know, there is no real high availability scenario for the print server in Windows Server 2012R2 environment. Many times we need that in case of a single server failure, users can do their job also when situations like this happens.
In these cases, it is possible to reduce the down time of a server deploying the second print server and use DNS CNAME to publish print servers. Anyway, there are negative parts in this solution:

  • DNS needs to be refreshed, so users can point to another server (consider to have short TTL on DNS record)
  • there is no supported way to publish that printers in AD. Publishing printers in AD is done thru computer name (A record) and printer shared name. As we need to publish printer thru CNAME record, this is not possible. There is a workaround with ADSIEDIT and changing published name, but this is not suggested. (I will cover this in a separate post)

Whatever, you can deploy printers with GPO preferences and this is not a so difficult process. You have just to be careful that every user has mapped the right printer (this can be done with GPO preferences filtering).
To create the discussed situation, first you must to have two print servers (in our case we will name them PS1.domain.com and PS2.domain.com). On the first server, you have to install and configure all printers that you need and you can share them, but not publish them in AD. Of course it will work also publishing them in AD, but if a user will choose a printer from AD, the failover will not work for him.
After doing this, you have to create a name and a CNAME record for our print server (I will name it PrintSvr) that point on the first print server. In our example:

CNAME PrintSvr PS1.domain.com TTL = 5 min

Keep TTL time small, because this time is critical when failover occours! Changing TTL it is not necesary if you plan to use Round robin.

With this, we can resolve our PS1 server with the name PrintSvr and you will be able to browse printers with CNAME, but if you try to install them, you will receive an error 0x00000709.

This is because we need some additional registry changes on the print server:

HKEY_LOCAL_MACHINE\SYSTEM\CurrentControlSet\Services\LanmanServer\Parameters
DisableStrictNameChecking QWORD 1
HKEY_LOCAL_MACHINE\SYSTEM\CurrentControlSet\Services\LanmanServer\Parameters
OptionalNames MultiString CNAME
HKEY_LOCAL_MACHINE\SYSTEM\CurrentControlSet\Control\Lsa\MSV1_0
BackConnectionHostNames MultiString CNAME
HKEY_LOCAL_MACHINE\SYSTEM\CurrentControlSet\Control\Print
DnsOnWire QWORD 1

The first and the last registry have to be DWORD type if you have Server older than 2012R2
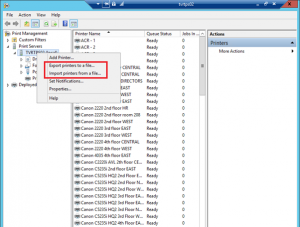
This are all the changes that you need to do. As we changed the registry, do not forget to reboot the server. When everything is completed, you can export the print server configuration from Print Management console to file. This we be useful on the second server.

Print
On the second server, you have just to install the print server role and add the same registry values. After doing this, you can import all printers in the same way as you exported them on the first server. This will import all your printers with exactly the same names and with the same share names. So, there will not be any problem when you will switch the server. Restart the server.
Now you are ready to test the environment. Change the DNS CNAME record in the way that will point to the second server and test if printers still work (of course you can wait that TTL expire or you can flush cache of DNS servers and client where you are testing).
Good work!.

LepideAuditor for File Server

LepideAuditor for File Server is a nice and powerful tool for auditing file servers. It has many good characteristics and it is one of my preferred auditing tools.
When I installed it for the first time, it seemed to me that I did something wrong; I was not able to realize that you can install and configure auditing software so easy. However, it was true. Installing and configuring this software is very easy and Lepide did a great job here. The next thing that surprised me was the fact that I had two completely separate modules – one for configuration and monitoring and the other for reporting. This approach gives me the opportunity to give to someone of the non-administrative stuff (company manager) the opportunity to control who is accessing the files and what is he / she doing in the system, without the ability to change audit parameters and with no need of any knowledge of configuration.

Lepide1
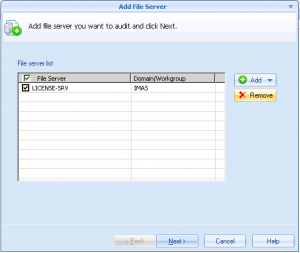
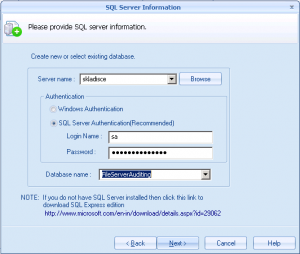
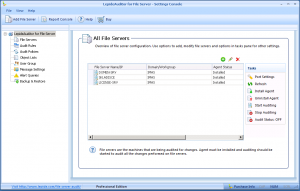
After installing the software from the install package, it is time to configure the software and this step is easy to do. For the first thing, you have to add the file servers which you want to monitor. This is done with a wizard in few steps and here you have to specify servers (you can browse from AD), select the SQL server and database, install the agent and add servers to Audit server group. Here I saw an opportunity for small companies, where administrators many times have problems with budget and buying a SQL server is not an option – Lepide File Server Auditor can work with SQL Express! This is not a limitation if you have a bigger company as you can choice a dedicated SQL server and in this way store more data.

Lepide2 Lepide3
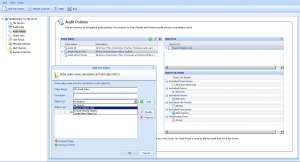
There is also a very simple and effective way to create Audit policy and this enable administrators with not so many knowledge to use preconfigured policies or quickly create a new one. Another great functionality is the object lists, which allows you to exclude some file types (like TMP) from logging or include just file types that you need to monitor. As it seems that is not so important, you will quickly find that is very useful to have smaller log databases. You can also set up logging for some users only or just for a group of users, but here I prefer always to log all users. You never know what will happen!
In addition, don’t forget to setup alerts! Alerting is done very good, you can choose all types of alerts and how you want to deliver them.
Lepide4
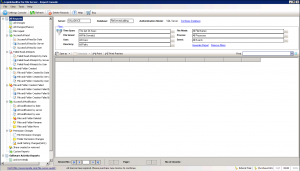
The reporting console is very nice organized, with many possibilities how to show and filter our data. It is nice structured and logically done, so anyone can fine his needs. I like a lot the concept of the console, where when you open it, you can immediately determinate some options and review the results. You can simply choose the event you are searching for (read or write file, change permissions, create or delete folder…) and apply on them additional filters true success or failure. It is simple!
Of course, you always need some special filters, where you have to search events and those are present on the top. They are very accurate and choosing the right combination will give you any expected result with only data that you search. It is one of my favorite reporting console, because you are able to find any result you need quickly and logically. Don’t forget that this console is many times used by IT and non-IT people. It is done very nice also for management or non-IT people; they will love it.
Lepide5
Conclusion:
Lepide did a great job with this product. It is very easy to manage and easy to install and configure. I can say that is reliable, so the results you will get are useful for all needs, printed reports are nice done and it is simple to explain the content to anyone. Alerting is very well done and I like the SMS and mail options, but here you have to be careful as you can quickly receive a lot of alerts on mismatched configuration.
I can recommend this software to everyone. It is a good solution for small and bigger companies, you can also think on integrating other excellent Lepide products together and in this way, you will have a very nice monitoring environment.

You can download LepideAuditor for File Server trial version from http://www.lepide.com/file-server-audit/download.html. .

Create Virtual network in Azure

I decided to publish few articles where I will document how to create a hybrid network between your local network and Azure (using some chip routers) and finaly how to create a VM in Azure as a part of your network. This is the Part 1 of whole proces and here is covered how to create Virtual network in Microsoft Azure.

In this article I will explain the complete step-by-step guideline how to create a network in Azure, site to site VPN from your local network to Azure and finally how to create an Azure VM connected to your local domain.
There are few things that you have to know:

  • local subnet,
  • IP of local router,
  • IP of local DNS server (in your AD domain).

First we need to create virtual network in Azure. This will be a part of our network, but as we will connect to this network via VPN, it must be on a different subnet.
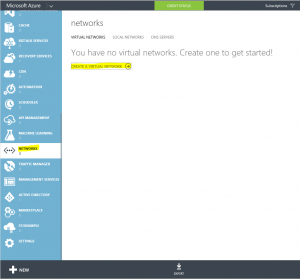
To create a Virtual network, you have to login into an Azure portal, select Networks and then Create a virtual network.

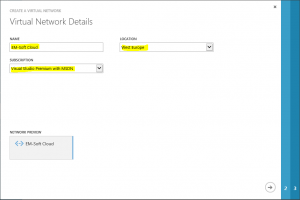
Screen1

This will launch a wizard for creating network and this are the steps that you have to perform. First just give a name to network and chose a location and subscription. Be careful with choosing a location. Later you will be able to use VPN only to virtual machines, in the same location where the network is.

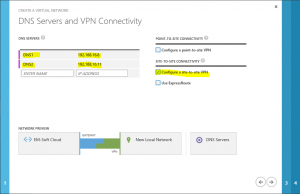
Screen 2

On the second screen you have to enter some data about connectivity. As we said at the beginning, the VPN will be site to site, so you have to select this one. DNS servers will be used to resolve names in this network and as we want to add a virtual machine, which is a part of our Active directory, we should be able to resolve it in our AD. This is the reason why specified DNS servers have to be our local DNS servers from local AD (not public DNS!).

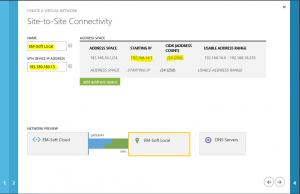
Screen 3Next step is to specify our local network. You have to specify the name of the network.
VPN device IP address is a public address of your router, from which you will establish the connection to Azure.
In address space you have to specify all of your private networks, from which you want to establish connections to Azure.
All of this data are needed by Azure for determination of routes and connectivity.

Screen 4

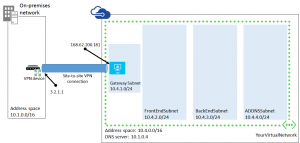
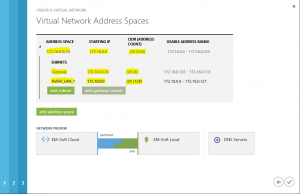
In the last step, you have to define the address space used in Azure. This is a private IP address space and has to be different from your local IP address space.

Screen 5

The rules to define are the same as those you have when you create VPN between two local sites, but there are some more settings:

  • Address space defines the whole address space that you can use as a part of Azure virtual network. Any subnet, which is a part of this network, must be created as a part of this space.
  • Gateway subnet: this subnet is responsible to have connectivity outside of Azure. In this subnet will be located a router, which will act as endpoint of VPN tunnel. Do not use this subnet to create virtual machines in it.
  • Subnet: you have to create at least one subnet. This will be the address space where you will create virtual machines. In many cases will be enough one subnet, but if you have to build a larger deployment, isolations of VM or similar things, maybe you will need more than one.

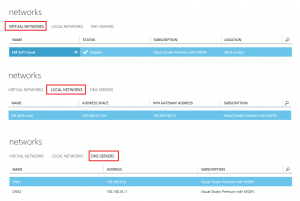
Screen 6

With this steps you created a set of network settings that include Azure virtual network, local network and DNS setting. When you finish this steps, your Azure network is ready to use, but don’t forget to create a gateway. This one is necessary to establish a VPN connection.

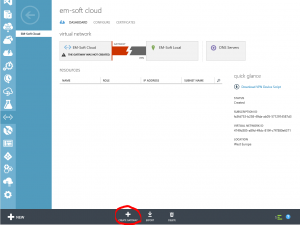
Screen 7

If you want to use this network in a combination with your local network, you have to create a gateway. This is an IP which will act as an end point of VPN Tunnel. For creating the gateway, you have another wizard; it is not complicated, but it could take time (30 minutes or more).

Screen 8

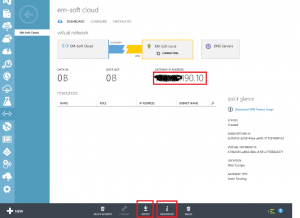
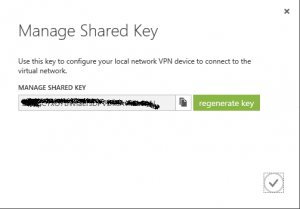
Click on create gateway on the bottom of the page, and use Static routing if you have a static IP address. After the creation of the gateway is complete, you will have an IP address of the gateway. This is the IP address that you will have to write into your local router as the endpoint of VPN. The only thing that is missing now, is a shared key. You can read it by clicking Manage Key button on the bottom of the page. Write down this key, because you will need it later in the router configuration.

If you have a router model (like Cisco…) that is supported by Azure, you can export data to configure it directly from the portal with clicking “Export” button. In all other cases, you will need to estabilish VPN manually – here you will need to press the Manage Key button.

AzN9

 For establishing the connection to Azure network successfully, you will need a preshared key and a gateway IP address (showed at previous and next picture). I recommend, to write them down into some file or on a paper.

AzN10.