How to enable the DaRT functionality in the MDT 2012

In the MDT version 2012 is possible to integrate the DaRT in boot images, created in MDT. This functionality is native, but some additional steps must be done.
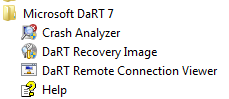
For the first thing you have to download the Microsoft Desktop Optimization Pack 2011 R2 from Microsoft TechNet and install the DaRT on your computer. Of course you need a x32 and x64 computer if you want to use both versions, 32 and 64bit version. When you will install the DaRT, you will install also the DaRT Remote Connection Viewer and you can use it for later connections to other computers.

The second step is to copy the file Tools.cab from the folder C:Program FilesMicrosoft DaRT 7v7 to  the server folder Deploytoolsx64 or (and) x86, where Deploy stands for Deployment Share path. I’ve attached both tools.cab files if you don’t want to install the DaRT on your computer, or you don’t have 32 and 64 bit versions of OS. You just rename both tools32.cab and tools64.cab to tools.cab, after copying them on the server.
At this point most is done. You have to restart the MDT console if it is open,then you must go to deployment share properties,and check the DaRT integration on WinPE tab.

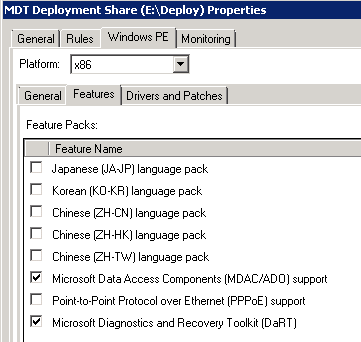
Be sure, that you enable the checkbox on both versions.

The last thing to do is rebuild the boot images and import them into WDS and other boot devices.

Tools32.cab (3.24 mb)

Tools64.cab (3.64 mb)

.

Upgrade from MDT 2010 to MDT 2012

Now is available a new version of MDT and of course there are new functionalities and new options. For this reason it is normal to upgrade it. There is no support to direct upgrade, but is very easy to upgrade it.
For the first thing, you have to uninstall the old version. You can uninstall it with default options, but be careful with deployment shares. You will need them in the future.
The second thing is a normal installation of MDT 2012. Then you have to start it. There you will see (or you will be able to import) all deployment shares, but they are not yet functional. They need to be upgraded.
Right click to any share and select the option upgrade. The share will be now present normally to the MDT and you will probably think that everything is OK, but if you try to use it, you will have problems. This is because you are still using the old boot image and this is the last step you have to do. You must rebuild all boot images and change them in WDS and other boot devices. I suggest, that in this step you select “Completely regenerate image”. You must have in mind that the version of MDT is changed and there are possible a lot of differences in the boot images.
That’s all. Make it a good use..

Windows server 2012 RC is available to download

From May 31th is available for public Windows Server 2012 RC. You can download the latest version from TechNet and test it. It is free and it offers a lot of opportunities to test new features and functions. This is really a big step in technology, so you must test it as soon as possible. Don’t wait for the last minute!
As always you can download an ISO image for setup or a VHD image. If you prefer prepared and guided labs, they are also available for testing and learn new functions. They are free accessible here..