Many times, in small companies, we need connectivity to internal network from anywhere. The easiest way to establish that connectivity is VPN network via SSTP protocol. In this case, we only need to open the port 443 (which is already open in SBS) and public a trusted certificate. There is a difference with PPTP VPN, because this type of VPN connection requires the port 1723, which is not always open (I mean airports, hotels, …).
Now we know why we can choose the SSTP connection. Let’s see what are special requirements for SSTP:
- it is supported only by Windows Vista SP1 or newer OS,
- a public trusted certificate for HTTPS traffic must be installed on SBS (it exists also a workaround with self-sign,but I don’t recommend it).
This type of VPN is not native supported to be configured from the SBS console. We must do this with few more steps, but is not so difficulty and I think everyone can do it:
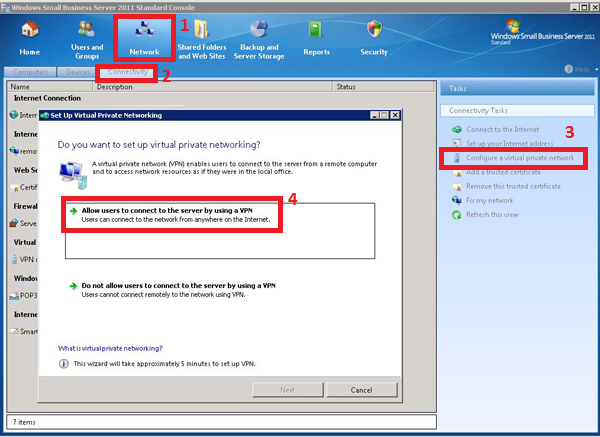
- For the first thing, we have to enable the VPN connections in the SBS console. Of course here we will configure the PPTP VPN, as this is the only scenario supported in the SBS console.
 For the same reason we will receive a warning, that we must open the port 1723 on router, but this is not necessary if we want to use only the SSTP VPN. You can ignore the router configuration.
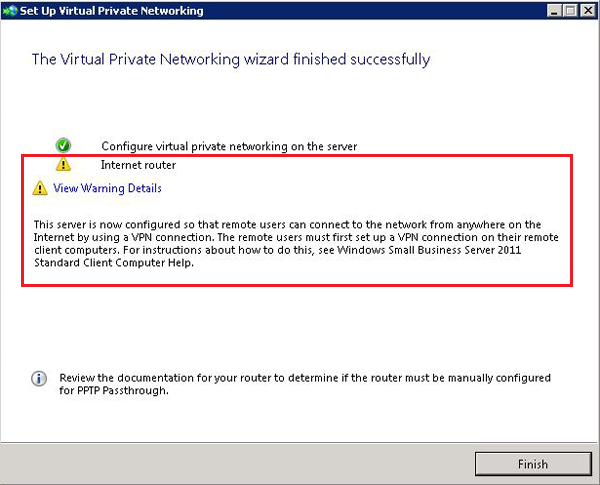
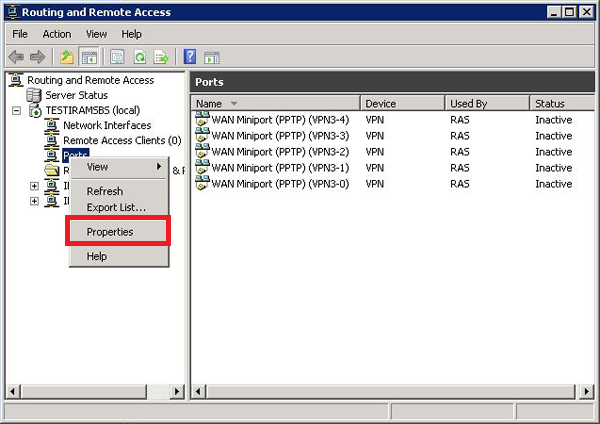
- We have to continue the configuration in Routing and Remote Access, where we must enable the desired number of ports. We enable this by clicking the right button on Ports and we select Properties.
 At this point we will see a window, where we have to select WAN Miniport (SSTP) and click Configure. Here we must enable Remote Access connectionand setup the desired number of SSTP connections.
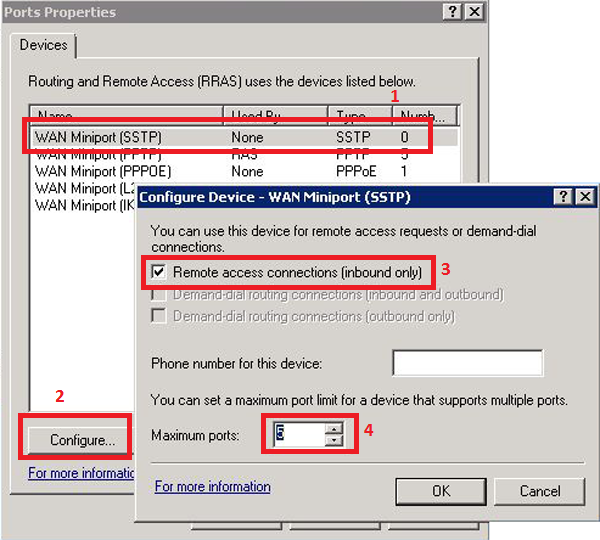 In most cases you have to do this step twice. For an unknown reason to me, after you click OK, the check mark on Remote access connections will disappear. The final view must be like this one (depends on the number of connections).
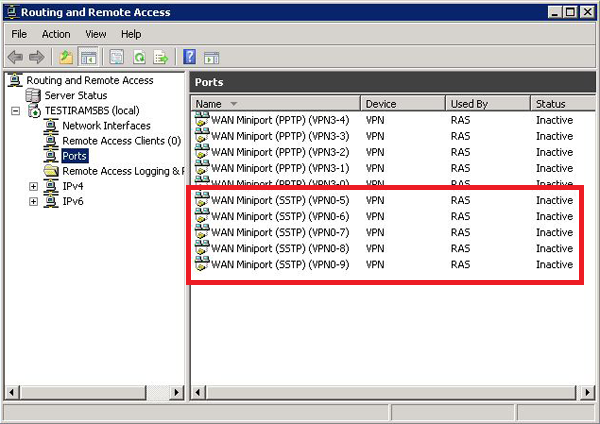
- From now we will work in the command prompt (don’t forget to run it as Administrator) and we will do the correct installation of certificates, we need to establish the sessions. At the beginning, we want to know how the certificates are installed now. We can check this with the command netsh http show ssl.
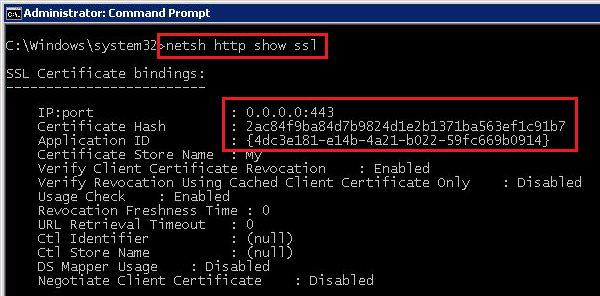 As you can see, on the port 443, there is installed a certificate only on the IPv4 protocol. A certificate hash must be the same as on our public trusted certificate (you can check this in the mmc). The second thing we see, is that is used the wrong Application ID for establishing the SSTP VPN. The current Application ID is from the TS Gateway; for the SSTP it must be BA195980-CD49-458b-9E23-C84EE0ADCD75.
- We have to change the Application ID. First we must delete the current certificates form the 443 port with the command netsh http delete sslcert ipport=0.0.0.0:443. If we find an installed certificate also on IPv6, then we must uninstall also this one: http delete sslcert ipport=[::]:443.

- Now we must install the certificates on the IPv4 and the IPv6 to the right Application ID with the commands netsh http add sslcert ipport=0.0.0.0:443 certhash=certificate_hash appid={ba195980-cd49-458b-9e23-c84ee0adcd75} certstorename=MY for the Ipv4 and netsh http add sslcert ipport=[::]:443 certhash= certificate_hash appid={ba195980-cd49-458b-9e23-c84ee0adcd75} certstorename=MY for the IPv6. Of course the certificate_hashis the hash of our public trusted certificate – the same we uninstalled previously and used for RWW and OWA.

- In the end we have to restart some services. Here we have more services, which depend on each other. The simplest way to restart all of them is using the command net stop sstpsvc to stop and net start remoteaccess to start them.
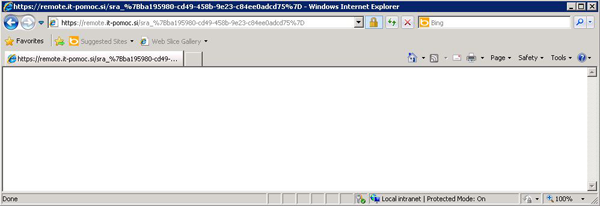
- The only thing now we have to do is to test, if everything is OK. This can be done by connecting to the application web site. We open the Internet Explorer and connect to the address https://remote.sbsdomain.com/sra_{BA195980-CD49-458b-9E23-C84EE0ADCD75, where remote.sbsdomain.comis a public internet address to connect to yours SBS server. The page must be blank, without any content!
This is all. If you have any problem, of course, you can do this process more times, but be careful to check the two registry keys:
HKLM System CurrentControlSet Services Sstpsvc Parameters Sha256CertificateHash
HKLM System CurrentControlSet Services Sstpsvc Parameters Sha1CertificateHash
This two keys should not be there, but if they are there, you can simply delete them..